3 4 5 ♥ Akemi's blog ♥: good stuff
Showing posts with label good stuff. Show all posts

Friday, April 4, 2014

[CINELEISURE'S NEXT ONLINE SENSATION 3] - Challenge 2: The NomNom Challenge !!

Hey guys!!!
Ever wonder what and where we will be heading for our challenge 2?


Tada!!! It's the super cute CHARLIE BROWN CAFE located at:

Cathay Cineleisure Orchard, #04-01
Opening 11am to 11pm, daily
Tel: (+65)  6836 6844 
Fax: (+65) 6547 4735

We were back again at Charlie Brown Cafe for our challenge 2! We would be recreating PANCAKES from Charlie Brown menu and believe me, it's not as easy as you thought it should be.....


But before we start, let me introduce my team mates!!


We are team TRIPLE "S" !!! Which were made up with:

Serene - the photographer of the day.
Shi Xin - the videographer cum narrator
Sihui (akemi) - the Chef !


So are you excited ????
.
.
.
.
.
.

LET'S GET STARTED NOW !!!

Before I get my hands on the whopping 180°C pan, let the shifu - NICOLE, do a little demonstration first! She carefully explained the steps and little details which aid us for getting the pancakes to look more presentable on photos!


.
.
.
.
.
.
It's now my turn!!

HOW TO COOK PANCAKES??!?!

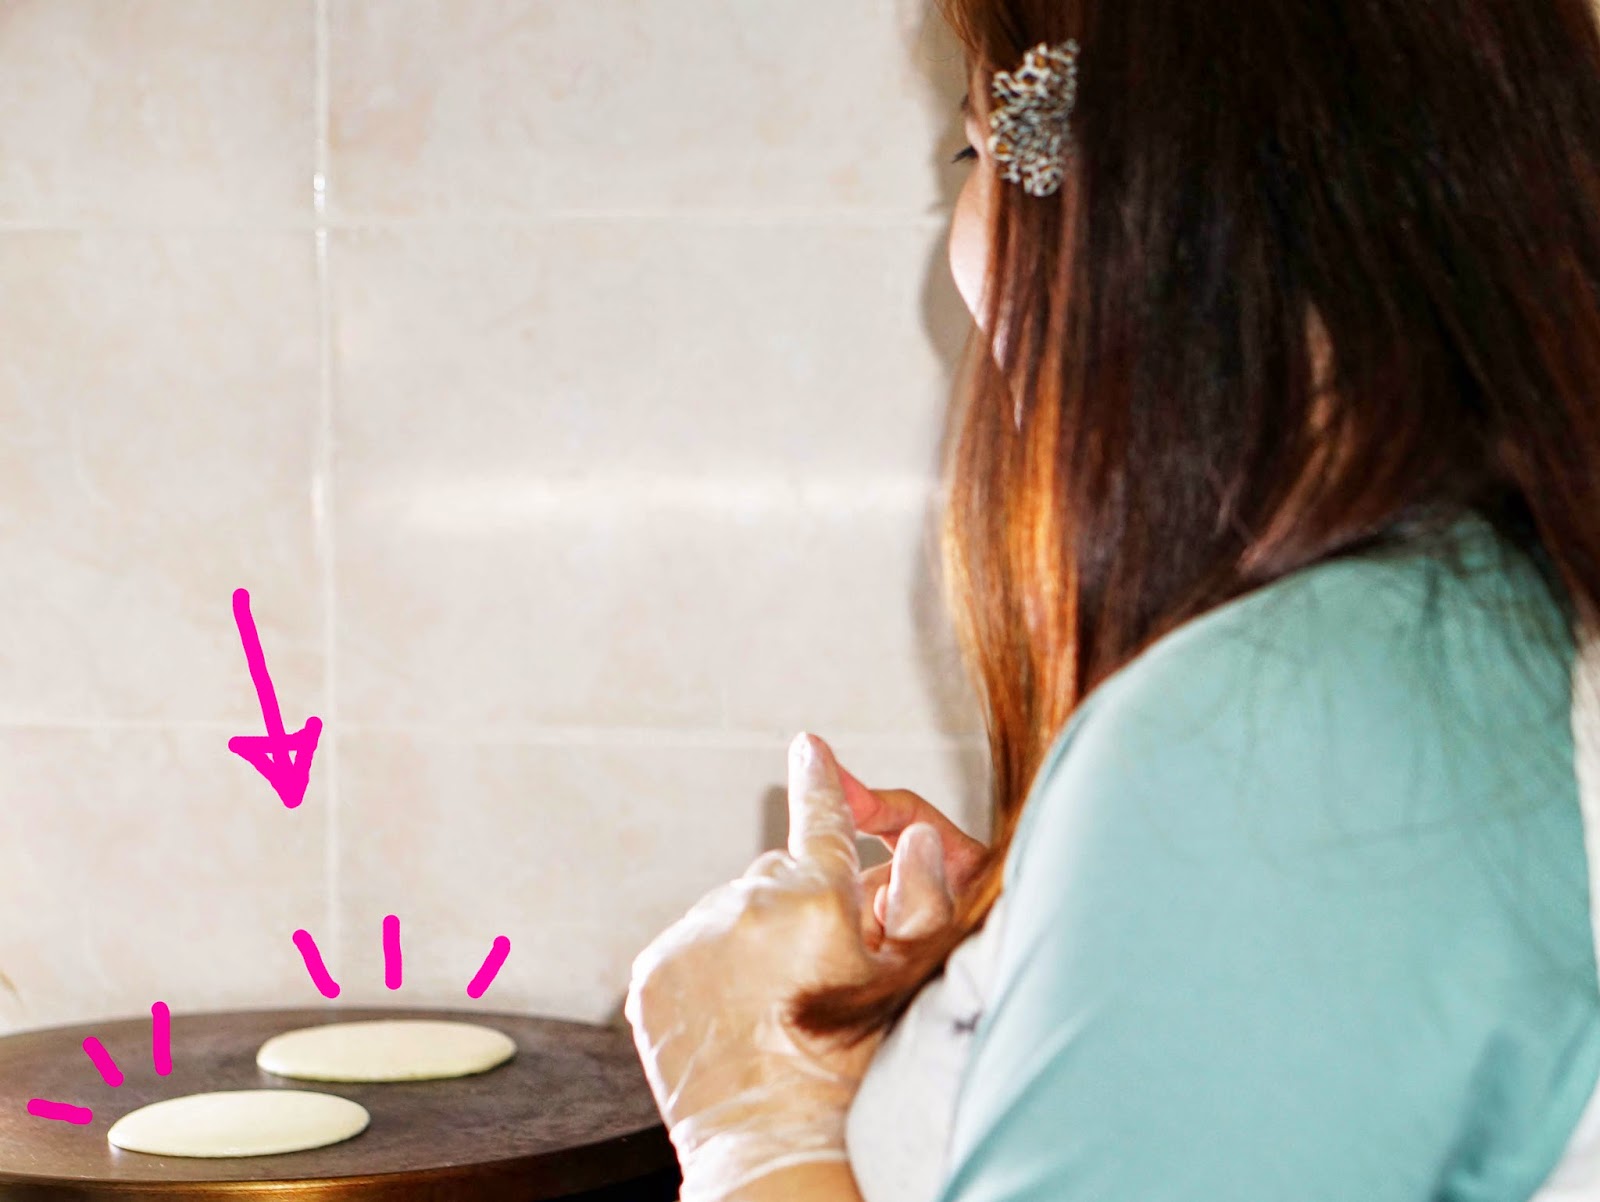
STEP 1 : Pour 2 round round shape mixture from the pancake mixture and wait till its bubbly.

STEP 2 :  FLIP IT!!

STEP 3 : Prepare the plates ~

STEP 4 : Not forgetting this cute little snoopy powdered with cocoa powder!!!


STEP 6 : SERVE AND SHARE!!!!

** Tips: Try to remember the steps and tips from your shifu! Because even a small action meant a lot to the end product!! To the extent of destroying the look~ *Like my first attempt*


A over sized pancakes!!! #failedtothemax


And now, let me present to you our final product!!!
.
.
.
.
.
.
** drumrolls**
.
.
.
.
.

= Best Shot =
jiang... jiang.. jiang.. jiang....

Swee bo?!?!? #flipshair

I'm actually quite happy with it, like a proud mama!! LOL... It's so pretty right? #flipshair

Look at the side by side image and you will know what I meant!


Ha Ha Ha....


Lastly, enjoy watching our video below:


Bye Bye and Good Luck!!!

#CNOS3 #itsgonnagetsensational

Tuesday, October 29, 2013

[Sponsored Post] Beauty Destination by L'Oreal Paris Singapore - Katniss Everdeen inspired look.

Hey lovelies! How are you guys doing?

I am still struggling with my new job, trying to adapt as soon as possible. So yeah, that's my excuse for not updating. BUT ANYWAY..... that's not the point for today's post. My point is, I'm back again for my 3rd L'Oreal Paris Singapore, topic of the month!

This month's topic is to re-create Katniss Everdeen look from The Hunger Games, Catching Fire. Right at the perfect timing, you can consider creating this look for the coming Halloween! Trust me, its actually quite easy to create! Especially with the 1st MARKER PEN LINER, SUPERLINER BLACKBUSTER!!

CREDIT: http://catchingfiremovie.org/

Lots of good stuff to be shared today and nuff said, here is my step by step to create my version of Katniss Everdeen look~  ^___^v


1] Using L'Oreal Paris Color Infaillible - 002 Hourglass Beige
Apply all over your eyelids right under your brows.

2] Using L'Oreal Paris Color Riche Quad eyeshadow - S4 Tropical Tutu / Col 3 (green)
Layer over and blend with the beige, covering half of your lids.

3] Using L'Oreal Paris Color Riche Quad eyeshadow - E1 Beige Trench / Col 1 (grey)
Blend the grey gradually from your lash line upwards.

4] Using L'Oreal Paris Color Riche Quad eyeshadow - E5 Velours Noir / Col 1 (darkest grey / black)
Blend in from the outer corners of your eyelids creating a sharp "C" shape.

5] Line your inner corners of the waterline white.

6] Using L'Oreal Paris SUPERLINER BLACKBUSTER
Create a sleek dark line on your lash line and "wing" up. The more exaggerating it is, the better it is for Halloween. Also create a sleek line covering about 1/3 of your bottom outer lash line.

I love how the marker pen liner glides smoothly during the application! And look~ curve and neat lines could be created even though I'm not a pro on make-up!! So beginners fret not, this shall be your first eye liner and I'm sure you will love it. Most importantly, ITS SMUDGE PROOF!!! Wheeeeee so no issue if you are out the whole day~ You will not have the "dark circles" after a day out!


7] Stick crystals with your eyelash glue!

8] And don't forget your falsies that has more and longer lash towards the outer lid. This will create a more "wing" out effect!


Lastly, Katniss look emphasis on her eye area therefore light pink cheeks and nude lips would be the best to compliment the heavy eye details~


I'm using L'Oreal Paris Lucent Magique - Blush of light glow palette which will be launched next month. I'm super privileged to be one of the first few to try it out~ And it's soooo awesome! The brush is so smooth and the palette came in 3 pink shades. It just blended very well together when applied.


Plus, its one of the blusher that has a mirror! #convenience

Not forgetting the nude lips to complete the look~


Here, I'm using L'Oreal Paris Heart of Pearls - 602 Chestnut & Chic. You can read more review about this lippie I posted previously HERE.


AND NOW I PRESENT THE FINISH LOOK!!!!


SWEE BO?


I'm actually quite satisfied with my eyeliner because basically, I don't use liquid liner or more like I DO NOT KNOW HOW~ LOL. So when I first tried this Marker pen Liner, I'm so shocked! Because it can create a different thickness of lines, when I thought it's gonna be thick! No fret newbies, it is VERY EASY TO CONTROL!


You should try it out to know what I meant~ and if you are keen:

Superliner Blackbuster is available at $20.90 at Watsons, Guardian, Sasa, selected Super & Hypermarkets and departmental stores.

Now you know where to get them and you shouldn't miss your chance of winning $150 worth of L’Oréal Paris products and a pair of tickets to catch The Hunger Games movie.

Simply, participate in the Big Bolder Eyes Contest and stand a chance to win !! Super simple and easy~ For more info, visit the micro-site which I've been sharing!!

CLICK HERE!!!!

For more info of this one-stop micro-site, you can refer to my previous posts HERE and HERE

Lastly, do remember to check them out for make-up tips and tricks, contest and my latest blog post on L'Oreal Paris products!!


GOOD LUCK!!

Monday, September 30, 2013

[Sponsored Post] Beauty Destination by L'Oreal Paris Singapore - Dressing up nails

Hi Lovelies!
Do you still remember the awesome website and tutorial I shared previously? If you don't, you need to seriously get a life! I mean it is a one stop micro-site where you can get all the make-up tips and tricks! Even better than goggling and searching on youtube~

PLUS, try your luck and win something by participating on their monthly contest! Check it out now!!!


For more information about the site, you can check out my previous post here!


So, the beauty topic of the month...
Les Petite Dresses for your nails!

ITS ALL ABOUT NAILS!!! *drools*

I don't deny anything about nails are my addiction. It just got me so hyped up and nail art ideas just overflow my mind....

Few weeks ago, I am very privileged to be invited to attend a nails workshop by L'Oreal Paris Singapore. This time, I'm introduced with their new nail range - Color Riche Nail Polish with everlasting shine for UP TO 10 DAYS!!!


Look at those beautiful colours! LOréal Paris has created limitless color, blended to dress your nails with the trendiest colors. Using a colorimeter, Loreal Paris colorist measure the color obtained in each nail polish shade to obtain the perfect nuance.

Look at this, one of the nail art design we learnt during the nails workshop which is fast and easy to create with the Color Riche!


.
.
.
.
.
.


What are the unique points for Color Riche Nail polish?

THE TECHNOLOGY: ‘Built-in Topcoat’


The Color Riche formulas contain film-forming polymers for shine and ‘crystal acrylic’ that functions as built-in topcoat to provide toughness and magnified shine to ensure the purest, truest color that lasts for up to ten days. The pigments in Color Riche are dispersed in ultra-fine particles for unique color intensity. The formulas are combined in a liquid gel base that glides on easily during application and provides even coverage over the entire nail surface. Thanks to this brilliant formulation, it prevents spreading the polish too thinly to avoid the runs and drips of classic nail polish.

Whoa..... that means, you can apply a new set of pretty manicure with shine at a faster time! No doubt , it dries up slightly faster than a normal nail polish too!


THE PATENTED BRUSH: Application made easy and smooth!


The stem specially designed for the product to adhere to the centre of the brush to deliver just the right dose of product. The internal and external capillaries of the bristles serve as reservoir to ensure better nail polish application. Flat and rounded brush, the splayed tufts make application more comfortable and control the flow of the nail polish so that each stroke applies an even layer all over the nail.

When I first use the Color Riche, my first impression just goes:

" OMG!!! Its so smooth and easy to apply!! I never ever apply such a neat and smooth polish without cleaning~ Love it to the max..." 

Believe it or not, for times where I'm just so lazy to do a proper nail art, I'll just apply the Color Riche! Because its simply so easy to apply and I can have a new set of manicure in just 5 mins~ *flick hair*


Not only did we learnt 2 new easy nail arts during the workshop, we also got a chance to take part in a Insta-nail contest! And you guess what??
.
.
.
.
.
.
.

I WON IT!!!


AND THE GENEROUS GIFTS I'VE GOT!!! 


SEE!! Erhem erhem.... *flick hair*

Do you want to learn and create this vintage floral nail art which I created with the Color Riche?!?! Then watch it here NOW :


What do you think? It's very easy right?

Now you can also create your own nail art and participate in the Color Riche Le Vernis Contest


and stand a chance to win Personal Advanced Make-up & Grooming course by The School of Makeup worth $500. 1 Lucky voter will also win a Personal Make-up course worth $280!

*WHOAHHHHH*

So get started NOWWW!!!

Color Riche Nail Polish is available in 30 shades, exclusive to Watsons at $8.90 each.


GOOD LUCK!! =D

Saturday, September 7, 2013

[Sponsored Post] Beauty Destination by L'Oreal Paris Singapore

Hi lovely ladies, are you familiar with make-up trends/ products? Or are you a noob just like me?

Well, even though I does put on make-up for work, party or date *actually Its all the same for me*, I'm not an expert with it! I just love to fiddle with cosmetic products until I get the correct look or style I wanted and I'll keep with that for years. =/


This time, I'm very lucky to be selected to attend the Cosmetic Workshop by L'Oreal Paris Singapore! Make-up Maestro Larry Yeo will be demonstrating handy make-up tips using the latest make-up products by L'Oreal Paris Singapore, focusing on 3 different make-up topics every month over 3 months.

I'm mad excited because for the first topic this month, I get to learn how I could UPSIZE my eyes and create the DOLLY look with Larry Yeo and his model of the day, Valerie Lim~


It is also something I needed badly for my ultra small eyes.... hmmmm... because my eyes does look this small :
( == __ == )


Now, good things are meant to be shared. I'm going to show you a MAKE-UP TUTORIAL on creating the upsized Dolly eye make-up I learnt ! Don't say I never share hor. And I guess it shall be my first Vlog! ha! Be prepared!!!

But before I show you my 50 cents worth of tutorial, let me first introduce you a awesome micro-site, BEAUTY DESTINATION by L'Oreal Paris Singapore! It's possibly the best site featuring easy steps to achieve your favorite looks~


WHAT YOU WILL FIND FROM THIS MICRO-SITE???
Its a one-stop site for make-up tips and tricks where you can pick up make-up advice, ask the experts make-up questions that have been bothering you, watch make-up tutorial videos and win attractive prizes by participating monthly contest!


Product information of the latest L'Oreal Paris cosmetics. Examples: product descriptions, where to buy and prices etc.


Make-up tutorial videos featuring celebrity make-up artiste Larry Yeo.


Ambassador's page where your favorite bloggers: dweam's , tippytapp's , including *erhem* MINE *erhem* blog posts can be found.


Contest page where you can join to win Samsung ATIV Book 9 Lite notebook worth S$1,199 each!


"Ask the Experts" where you can submit your burning make-up questions to L'Oreal Paris experts.

It's awesome right? I do not have to painstakingly search for any make-up tips and wonder if it works because with this site, I'll have tips and tricks on hand! So do check it out!

Alright, as I mentioned earlier, the first topic this month is all about how you can UPSIZE your eyes and create the DOLLY look! So for my first Vlog, I'll be showing you the tutorial to create this dolly look I recreated from what I learnt from the workshop~


Its fast and easy right? Well if a make-up noob like me can do it, means you can too!!

PRODUCTS USED:

Les Ombres eyeshadows [ S$22.90 ]

Black Lacquer eyeliner [ S$20.90 ]

Lash Architect 4D mascara [ S$27.90 ]

Heart of Pearls [ S$18.90 ]

( All L'Oreal Paris cosmetic mentioned above are available at Watsons, Guradian, SASA, selected departmental stores and super/hyper marts. )

More pictures of the dolly eye make-up I did the other day...


I used brown in these pictures compared to blue in the video. Chio bo? LOL...
.
.
.
.
.
.
.
.

Actually these products I used are really good... If I were to choose my favorite item, I would say the Heart of Pearls is my favorite!


Really loving L'Oreal Paris new product, Heart of Pearls lipstick that was newly launched this June . I'm not a lipstick person because I dislike the dry feeling on my lips every time I applied a lipstick. But with the new heart of pearls, it was uniquely formulated with a pearl core within the lipstick and a highly moisturizing lip color. Plus, it's super LIGHTWEIGHT!!

Most importantly, its shades allows me to complete with the dramatic eye make-up which I normally wear. So its definitely a must buy!

Hope you like my first make-up tutorial and please feel free to share with me your DOLLY LOOK!
.
.
.
.
.
.

Lastly, do remember to check out BEAUTY DESTINATION for more tips and tutorials!! AND JOIN THEIR DOLLY EYE MAKE-UP CONTEST!!

GOOD LUCK~

Sunday, June 30, 2013

bye bye LION HEAD!!!

Ello~

If you all know, I've always have a crazy/ messed/ dry and etc hair!!! Ever since I graduated from my secondary school, I've always colour , perm or re-born my hair. Lately, I even 
BLEACHED!!!  Can you imagine how bad was my hair?
.
.
.
.
.
.
.
.
.
.
.
.
.


YES!!!
LIKE A LION!!!


Last month, I had my hairstyle changed! You can read about it here if you've missed it!!

So after the hair cut, the stylist blow dried my hair till I'm really loving it!! But true enough, my hair just got to transform to its crazy way the next day~ So I try all sorts of hair taming products and blow drying with my mummy's lao kok kok hair dryer:


That look something like the above with only a timer setting and high/low setting. =/

But it just don't work~ I even researched and bought a hair dryer!! *after researching and found out, I need to use a ceramic and ionic dryer to tame my hair*  I also you-tubed on blow drying hair tutorials!!! So for the pass few days of trying.....

DAY 1: FAILED = Therefore I tied my hair.. TT_TT

DAY 2:  STILL ACCEPTABLE??

DAY 3: Love the fringe ONLY~


No doubt, the hair dryer thingy REALLY AFFECTS!!! 

But now, I'm too lazy to wake up earlier to slowly blow dry my hair by sections!! And I finally decided to follow what Keida, from Clover, suggested to me earlier!!

It's a hair treatment that tames and flatten the hair to reduce flyaway. It's called the KERATIN HAIR TREATMENT~

I researched a bit about it and saw a lot good reviews about it especially for natural curl hair ladies like me. You should check it out too!

So the whole process is about 3 hrs for this length:


and do keep in mind you can't wash your hair for 2-3 days after the treatment, so as to allow the proteins to set in your hair~

Here's my after treatment peektures:

Right after the treatment!! It's super soft loh...

2nd or the 3rd day after the treatment~ Love it when the wind blow...LOL

Few days after the treatment!!!
Must take " wind blow" pictures because it super duper soft and I felt like a star~ LOL

and a comparison:


WHAT DO YOU THINK ?!?!!

I must say I love it to the max lah!! I confirm will do it again after a few months to maintain this healthy looking hair!! and you know what? I'm still able to colour my hair even after I did this treatment! Unlike some other treatment, where I need to wait for a few months after I can do any chemicals to it~

LOVING LOVING LOVING IT!!!!